Oar Stowage

There long, ungainly and important.  But, how to store them?  This seems to be the vexing problem, especially if you want oars over 8′ long.  And, if you settle for 8′ oars they will be a little too short.

Well, you’ve seen my 9′ break down oars.  Now, let’s store them.

DSC00427 Starboard side:  The water gutter provides a nice little dip for the blade section to rest into.  They also fit nicely along side the filler boards.DSC00428  Port side:

DSC00434And, I can still move the filler boards forward with the oars stowed away.  A little tight, but it works.

DSC00432
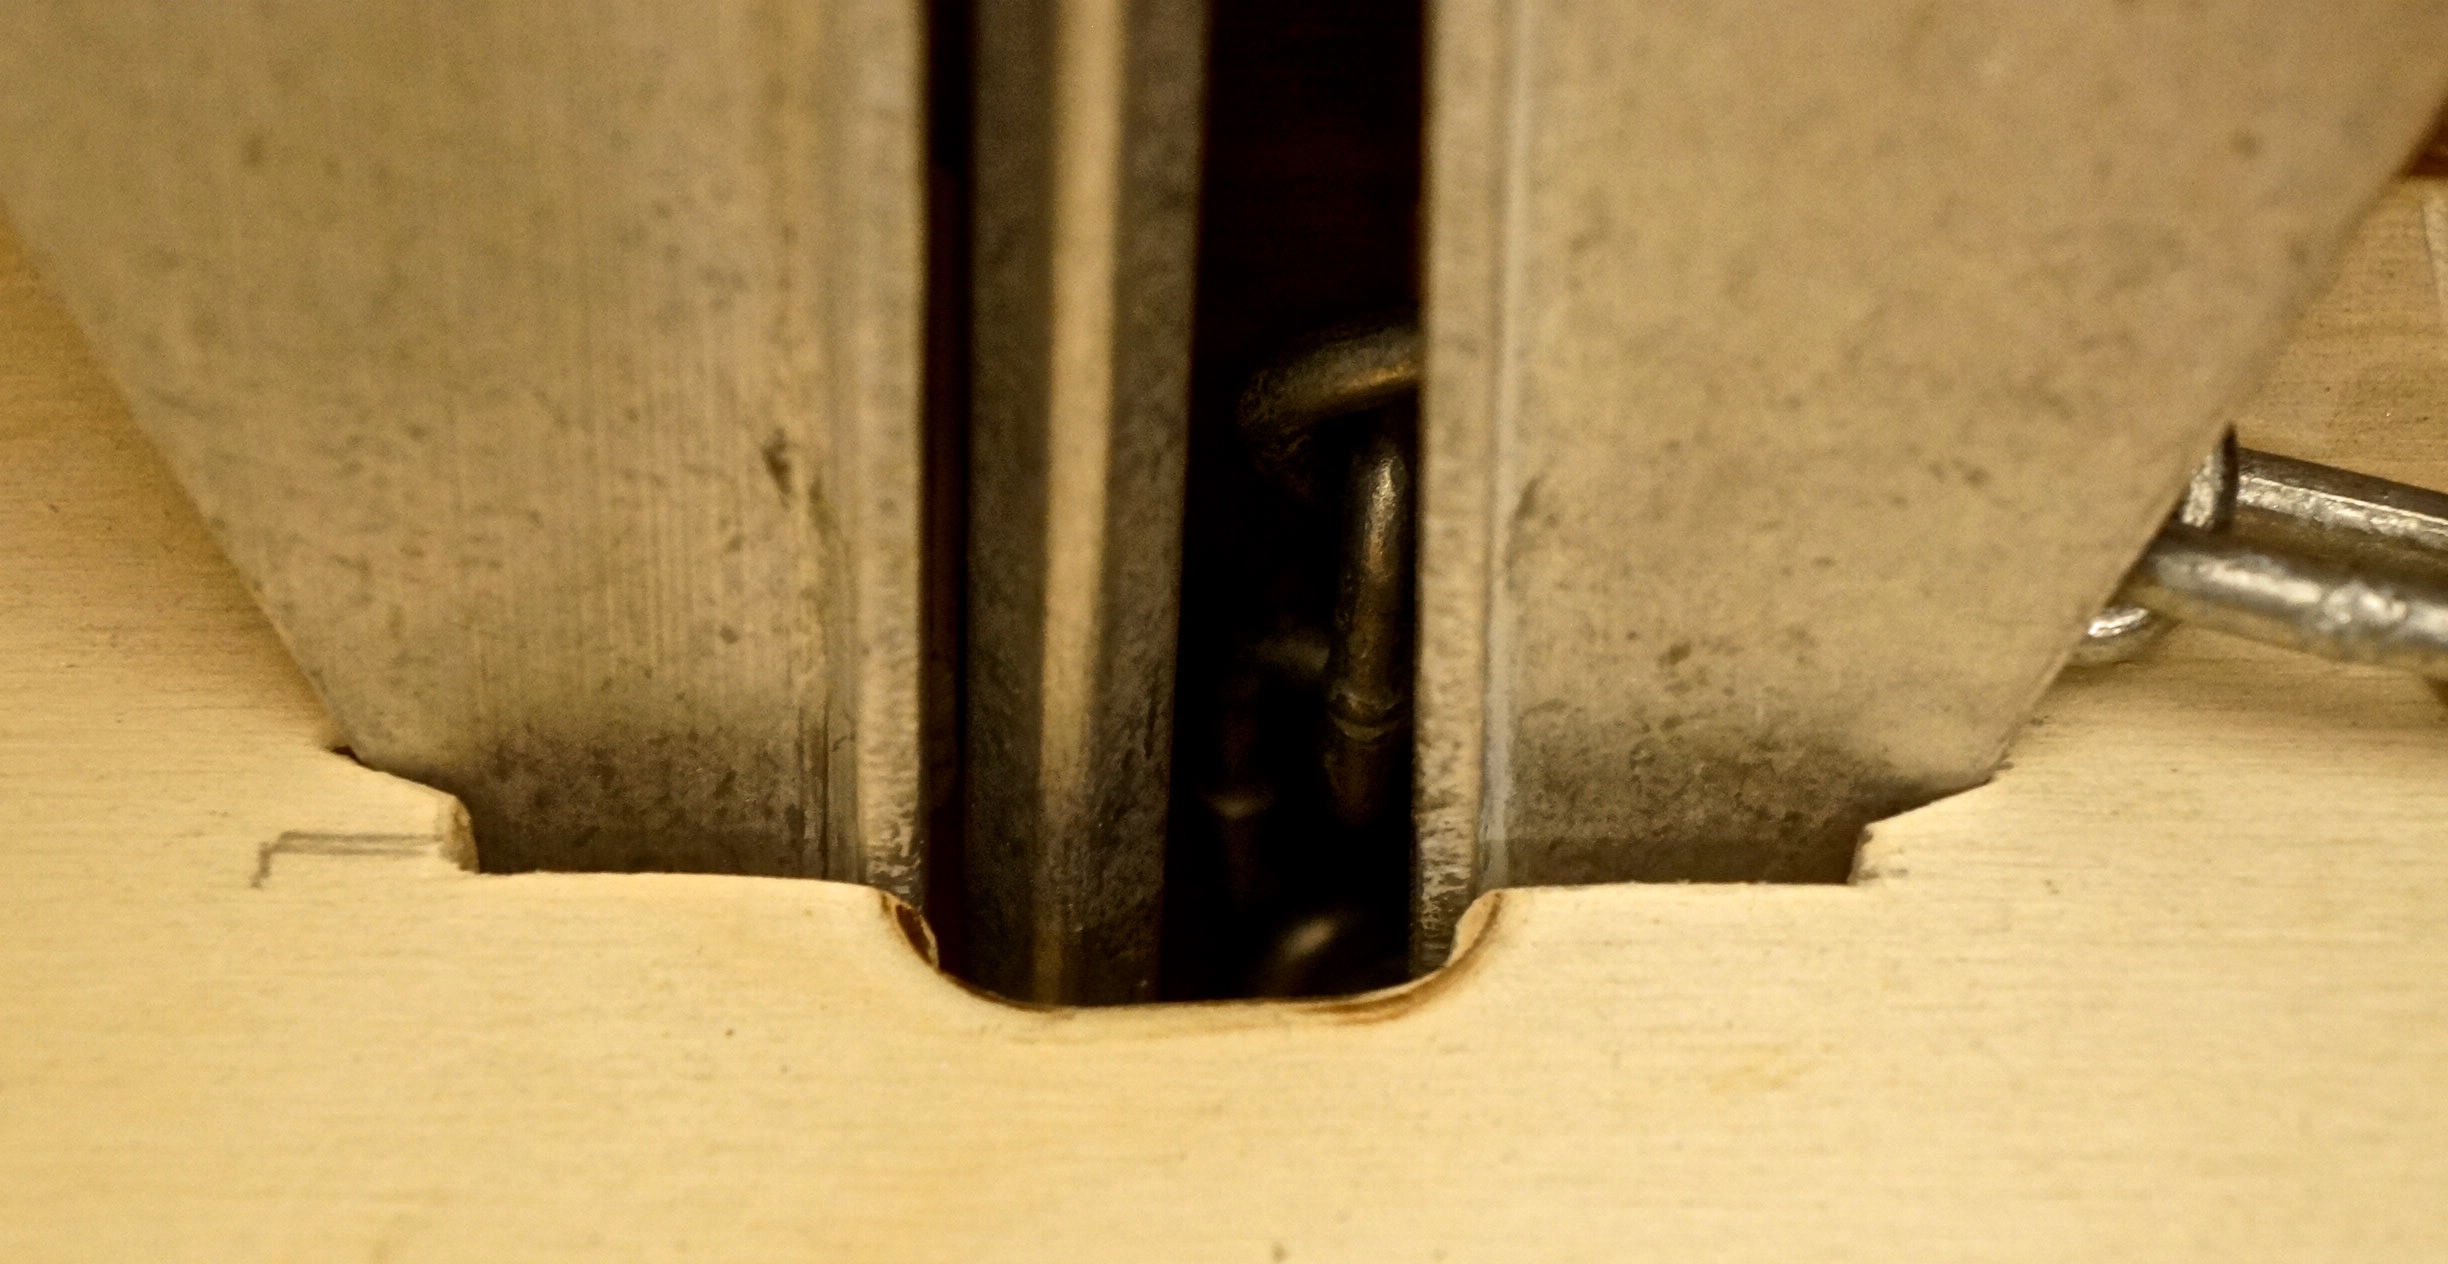
I wanted a system that held the oars securely even if the boards were removed.  Meet the basic bungie cord.  Both ends are knotted inside the wet storage locker.  This keeps the system trim.  I drilled 4 holes into the wet storage area (2 for the blade & 2 for the handle).  There is a knot between the blade loop and handle loop (also located inside the wet storage area) to keep the handle loop from drawing tight.

DSC00433
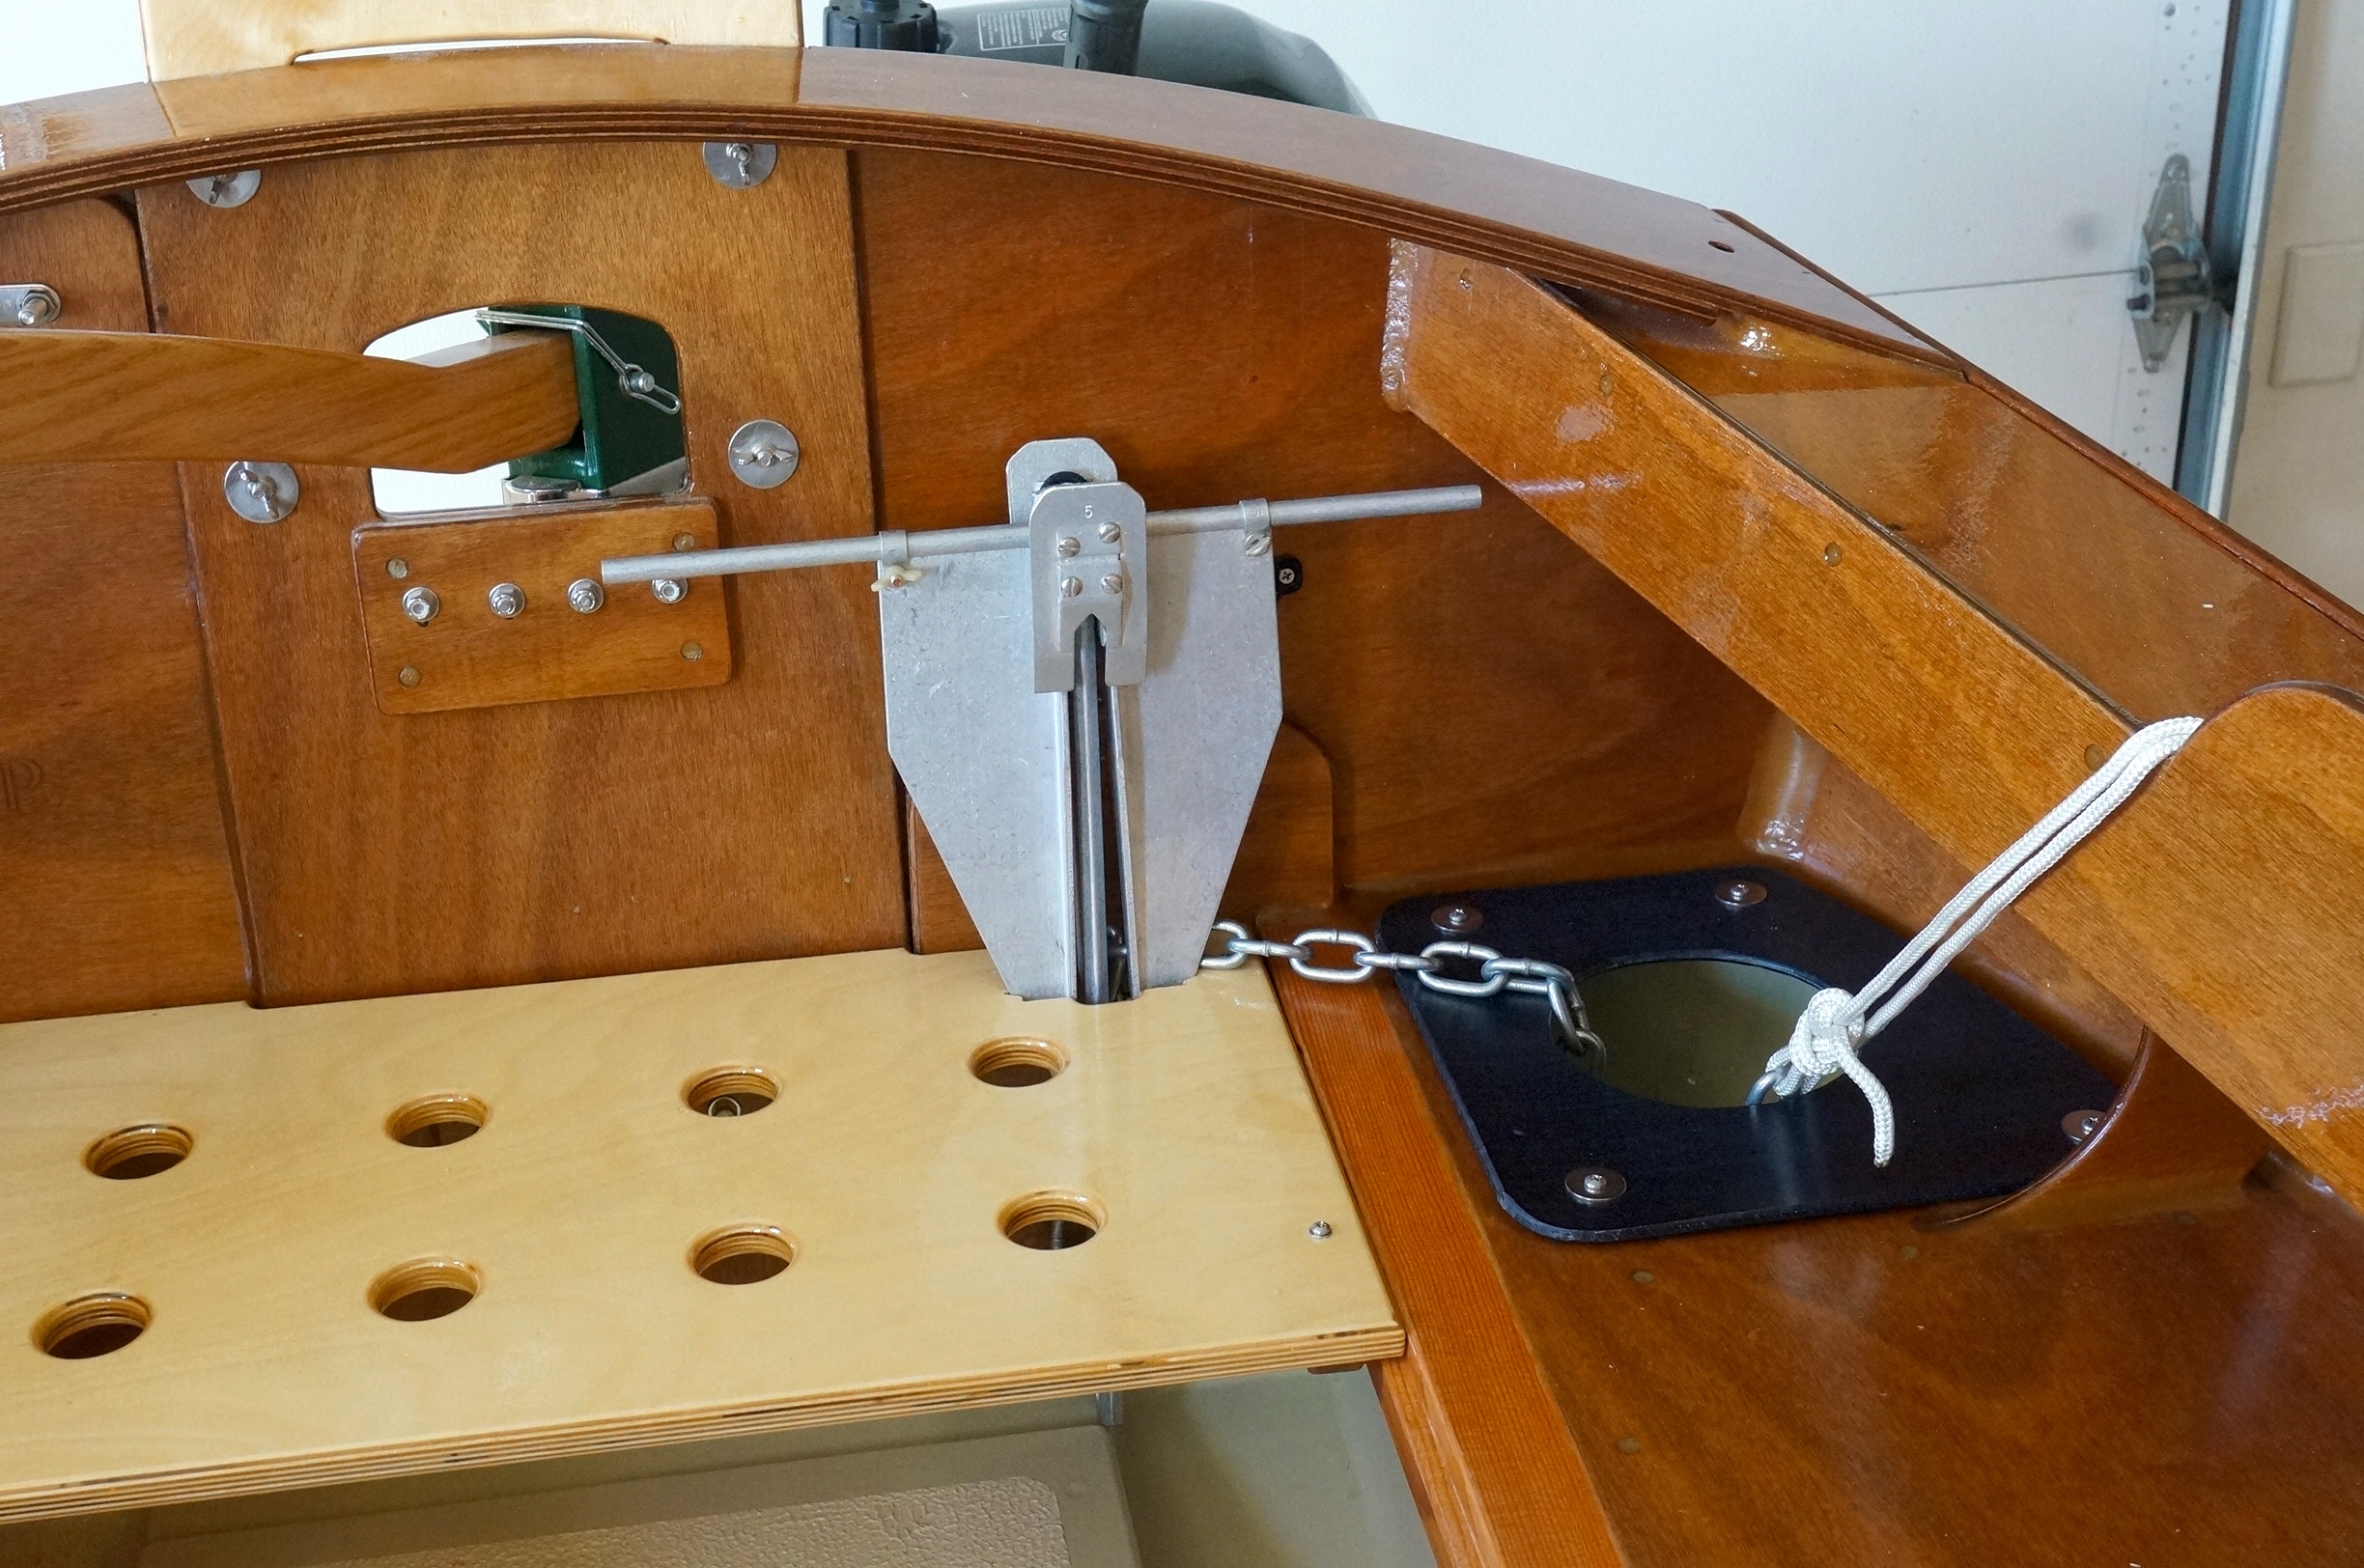
This shows the Port side and the proximity to the anchor arm.

DSC00426Starboard side Upfront:  I moved the CB uphaul line up higher on the seat longitudinal.  It provided just enough room for the oars to run underneath them.  The bungie keep things from shifting inboard and provides a nice spot to tend the CB uphaul line.  The water gutter again provides a nice notch for the bottom oar to rest.

DSC00423
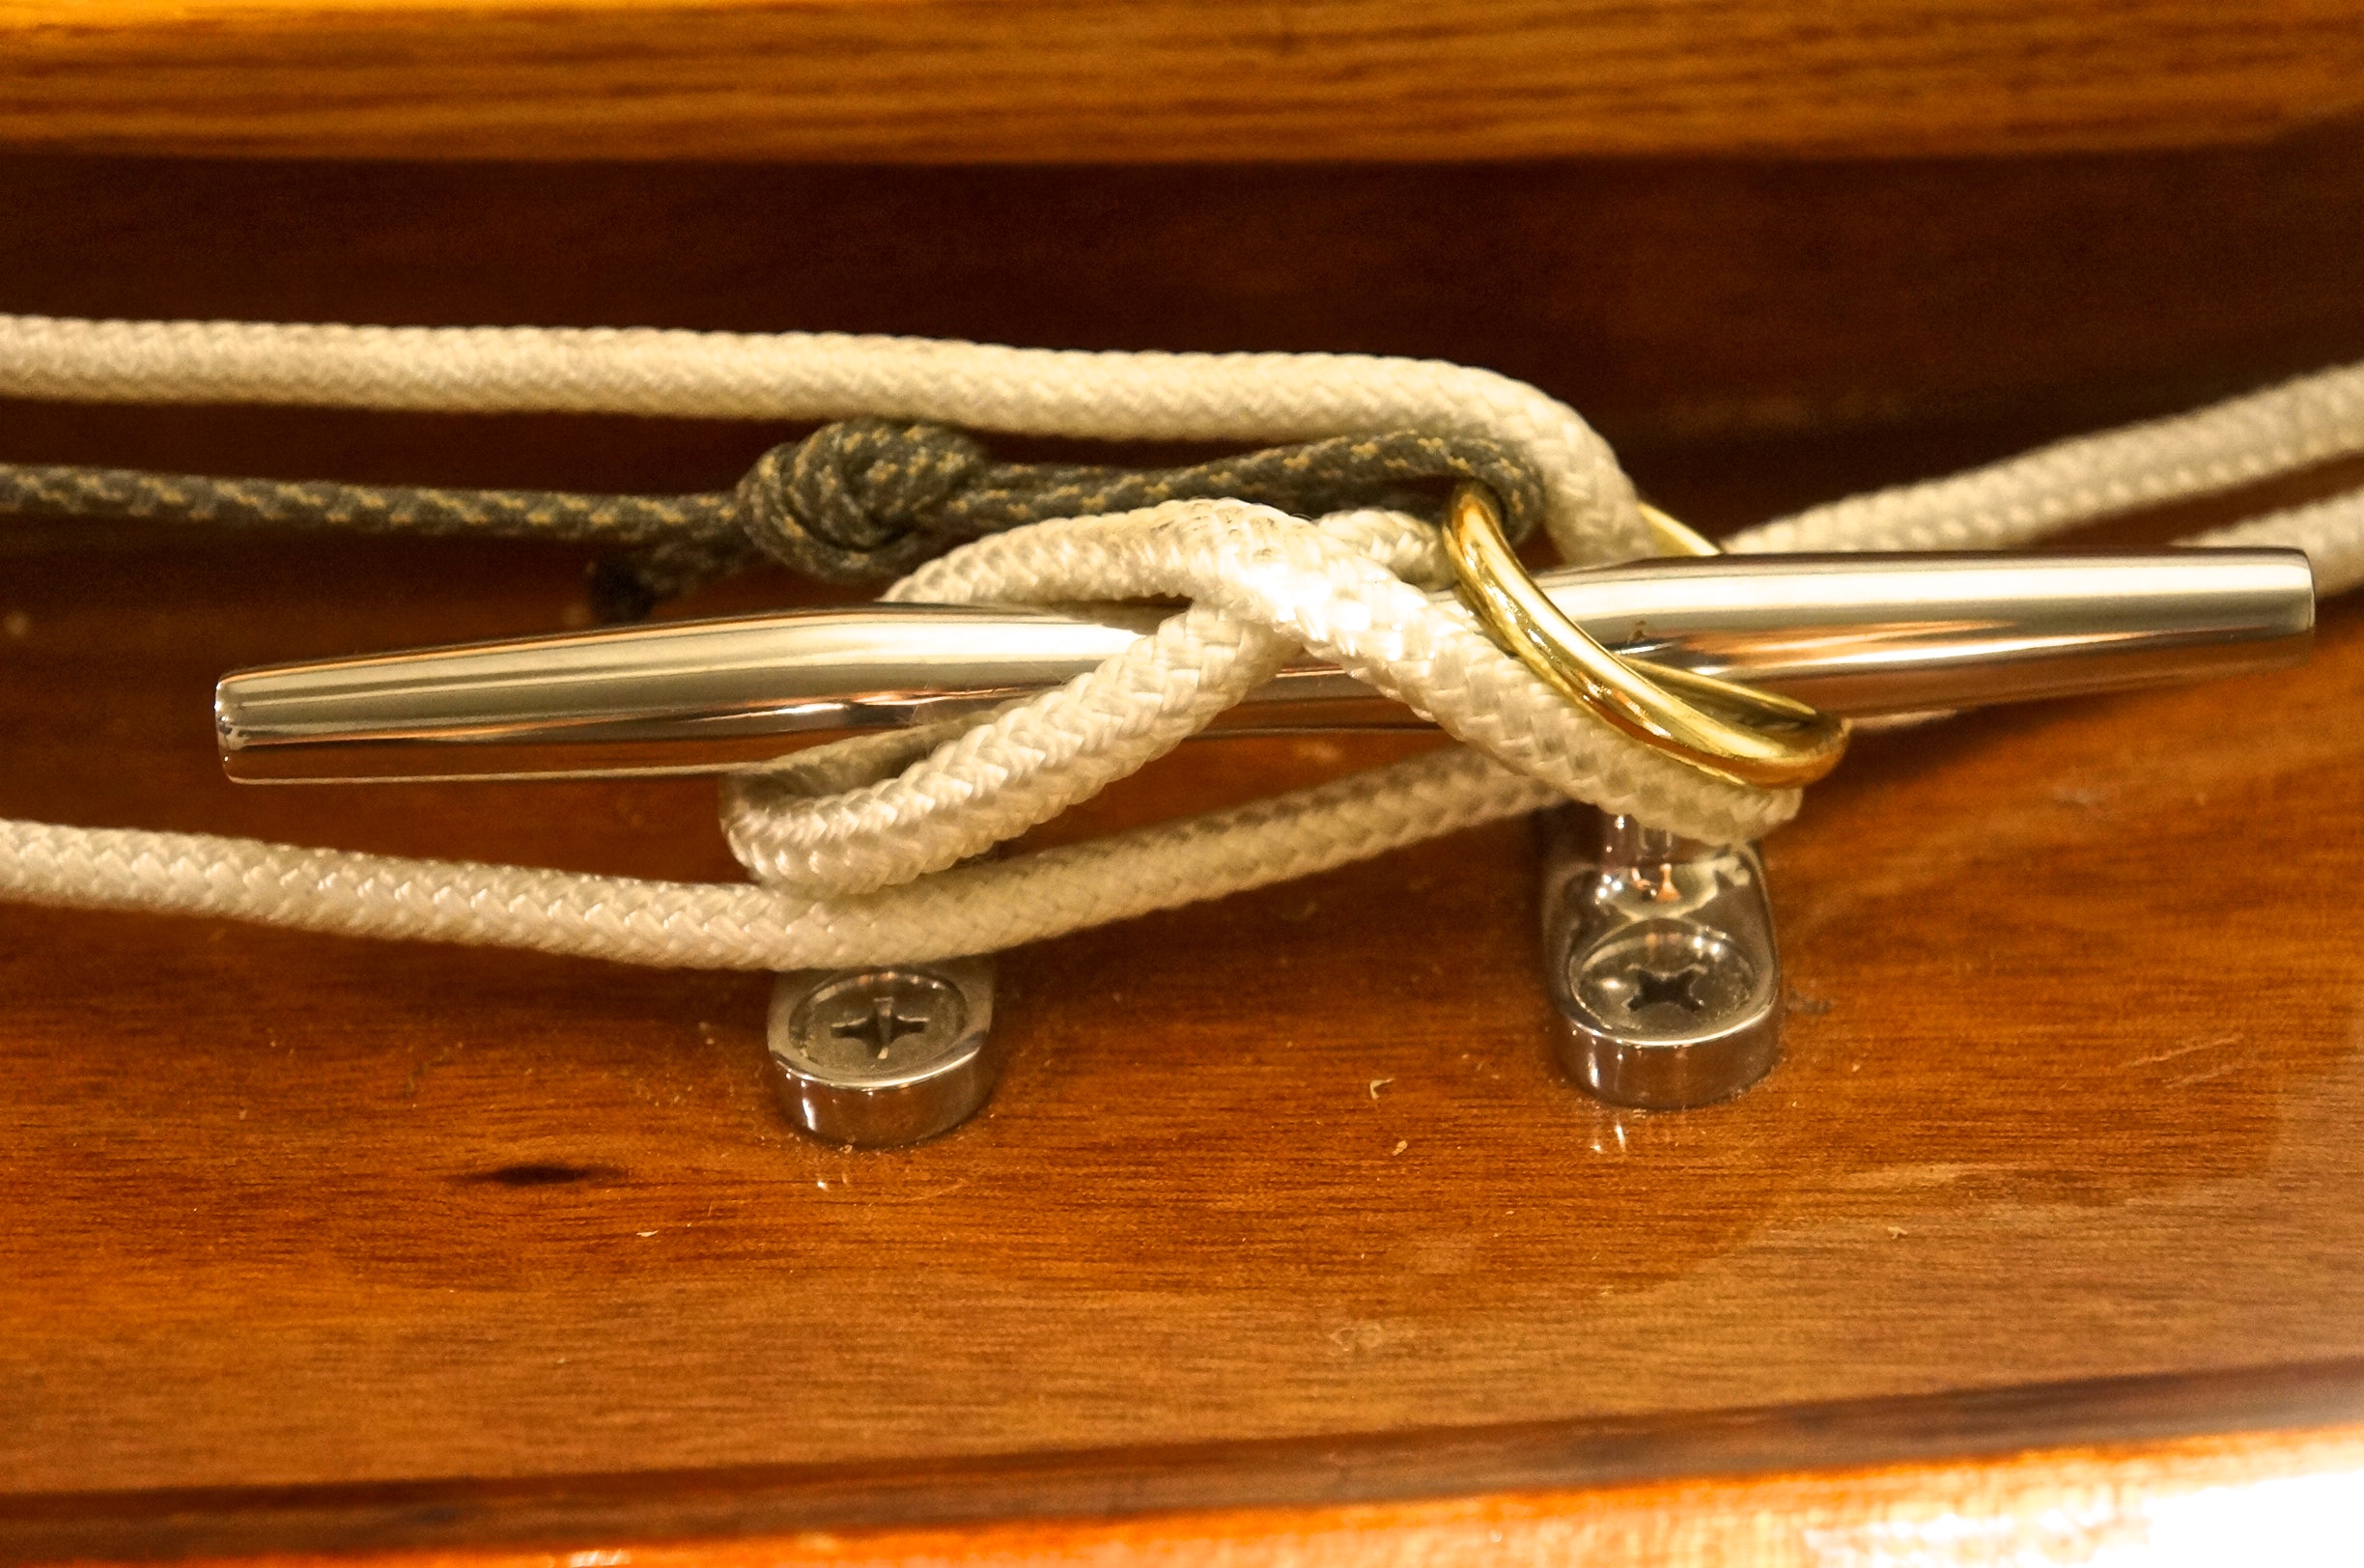
Port side Upfront:  When you want to retrieve the oars, you simply pull the bungie forward and slide the two stick forward and out.

DSC00424
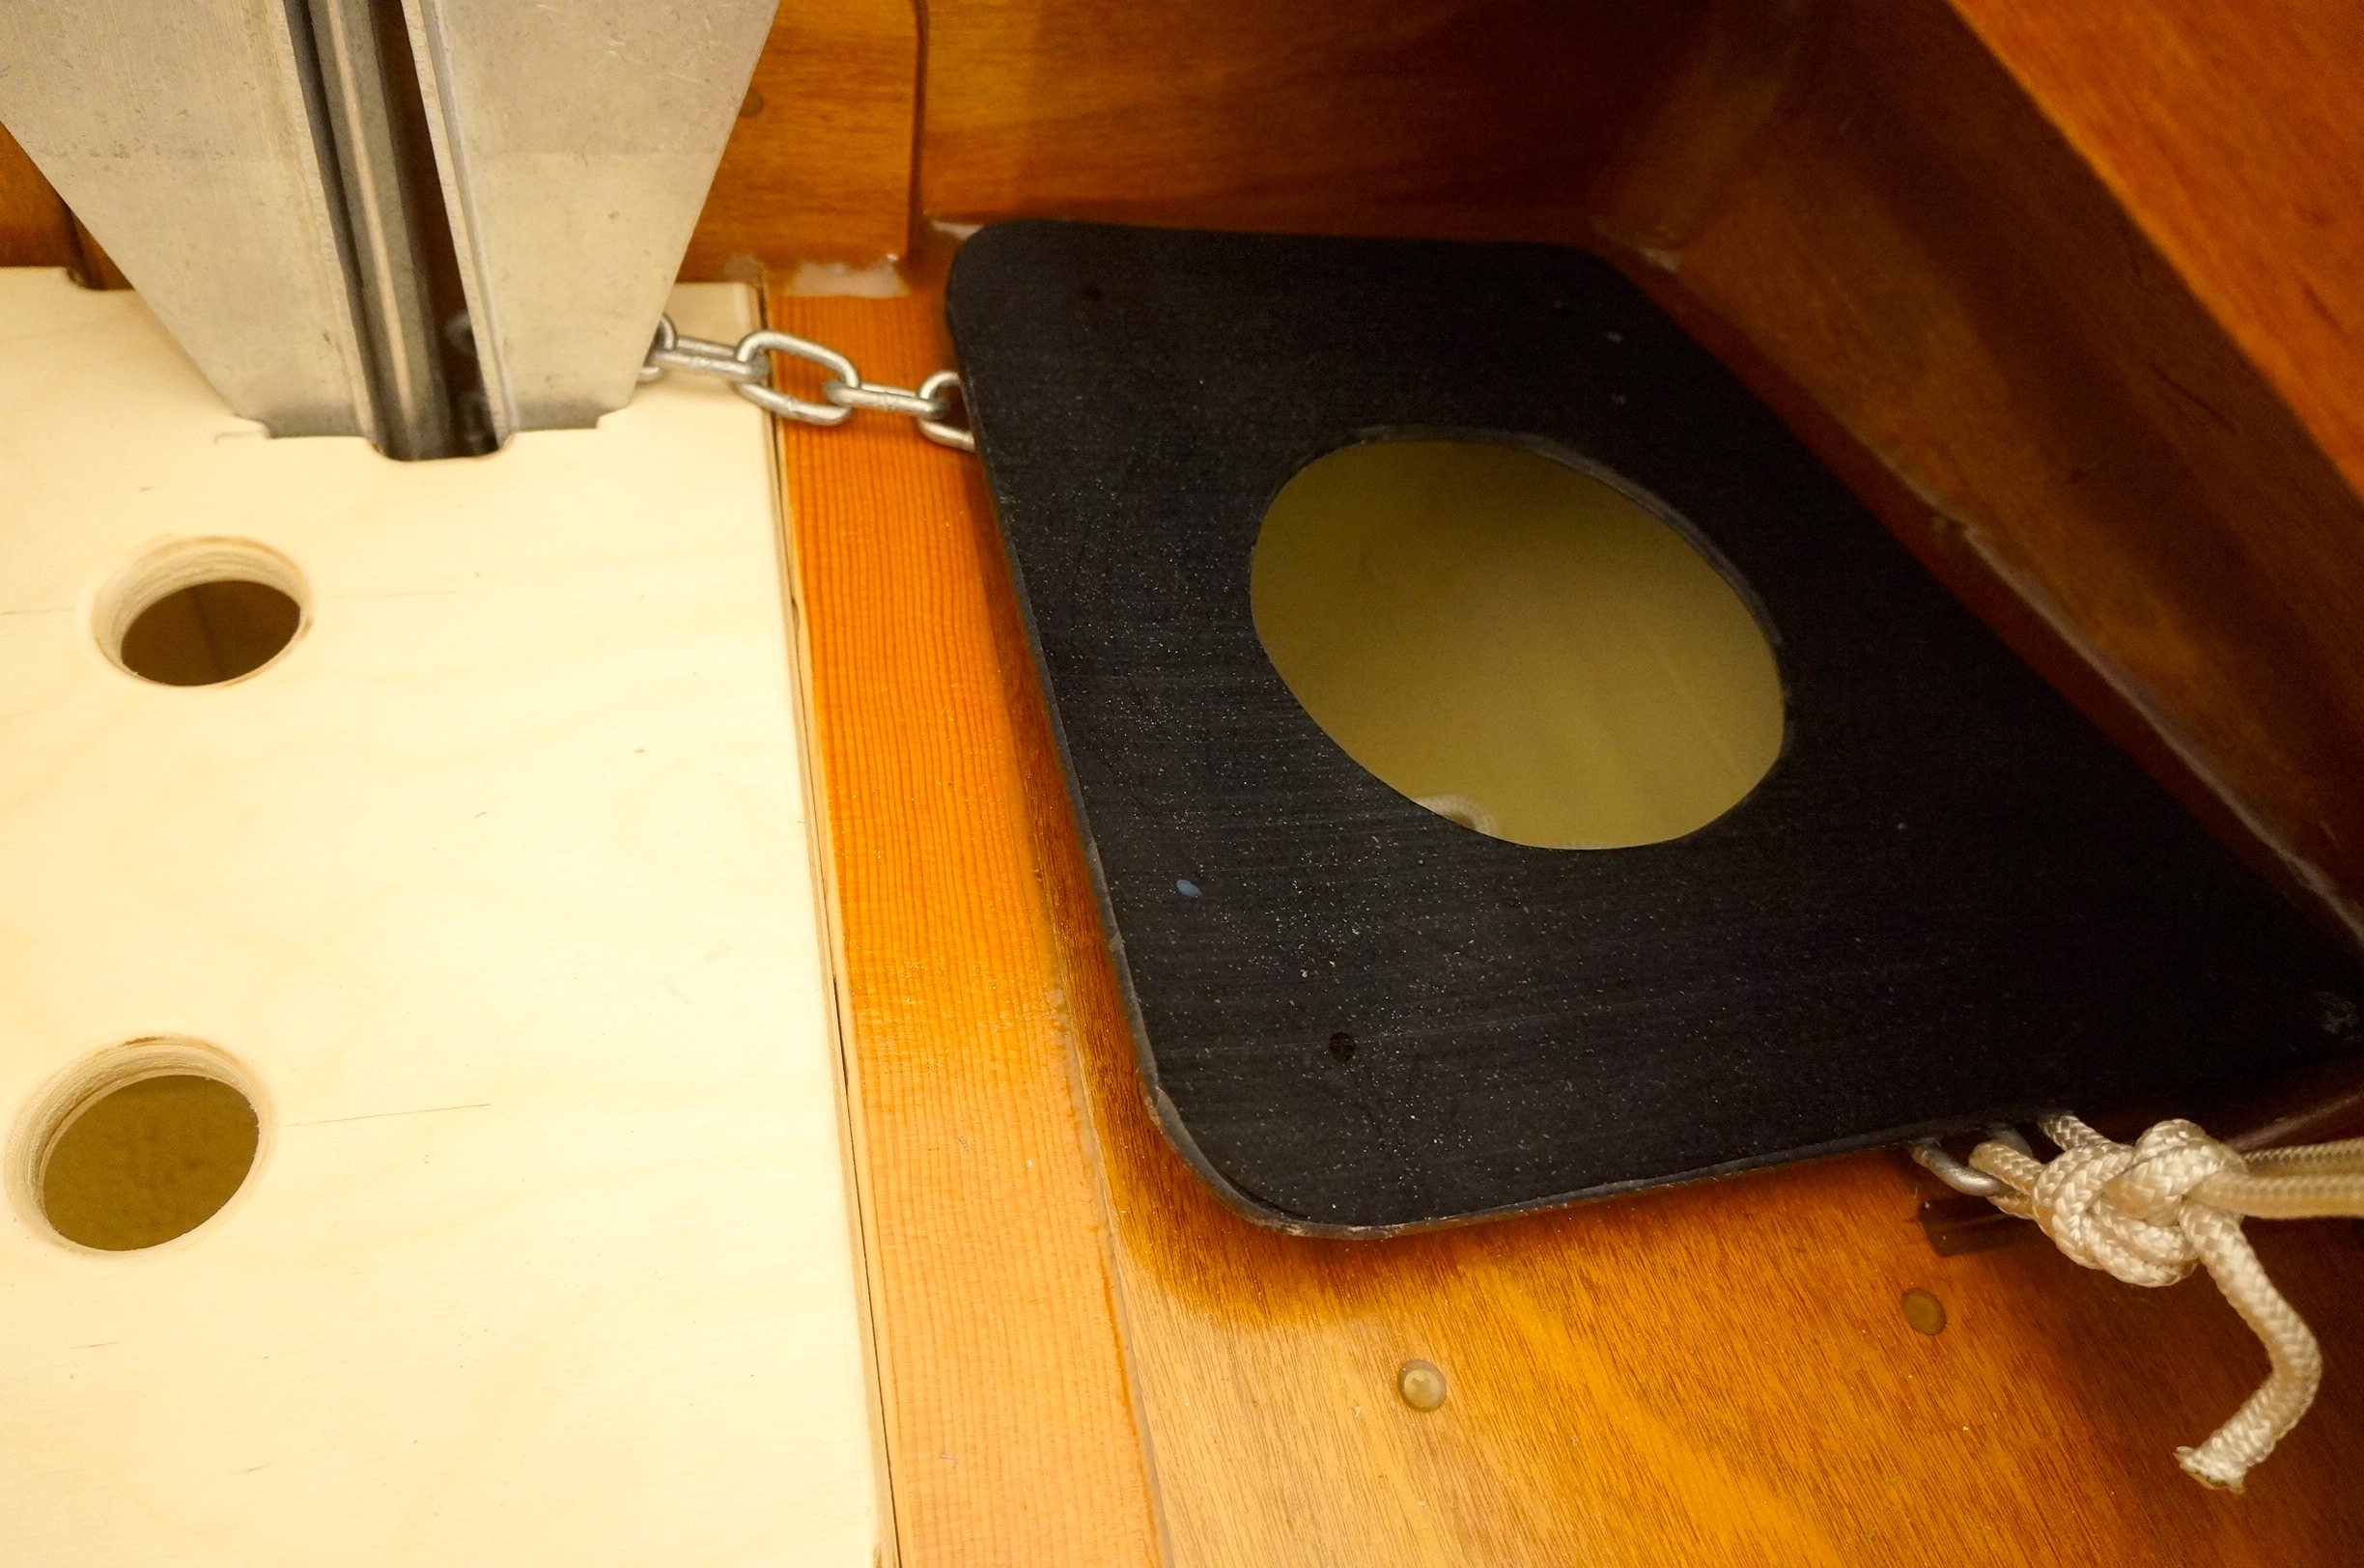
The knots are tied under the seat extension and inside the footwell.  This keeps it simple and clean.

I’m happy with this basic system.  Now moving my attention to fender stowage.  I do not want these things inside my boat.  

More Outfitting of Shackleton

Warning:  This post may be extremely boring to many of you, unless small details matter.


3 things I’m trying to solve in this post:

  1. Garbage stowage
  2. Fire Extinguisher stowage
  3. Seat Cushions

Let’s jump first to the garbage issue.  I decided to add a garbage in addition to my bail bucket.  This leaves the bail bucket free to store shoes, bail and function as a toilet.  So, I now need a place for garbage.

DSC00441 I added a soft stuff sack which holds half a dozen grocery bags to the front side of the library, secured by a tea hook.

DSC00443I can pull out a garbage bag, secure it to the hook and place all my daily trash in it.  Once in a harbor, I can simply discard the bag/garbage.  This system will provide me with 6-8 garbage bags for a given trip, which should be sufficient.

Now for the Fire Extinguisher:

Coast Guard rules say if your boat has a motor, you need to have a fire extinguisher on board at all times.

DSC00435In reviewing the ideal location for a fire extinguisher, I learned there is not an ideal location.  There is only good, better, best.  I settled for good/better.  Ideally, the fire extinguisher would be more accessible in the event of a fire, this would be best.  But, to mount the extinguisher up top would add to the cabin clutter and could snag on a strap or line, which could cause an accidental discharge.  Also, they are quite heavy.  To add this much weight up higher wasn’t to my liking.  So, I settled on the ballast chamber.  This offers good access (albeit a few seconds longer to retrieve) and best with regards to keeping the weight low in the boat.

DSC00436It just so happens that my vault lid screws are perfectly spaced to prevent the extinguisher from moving left or right.  The gap between the bulkhead and the vault also provides a nice nesting place for the extinguisher to settle in.

DSC00439This was simple to install and should be fast to remove in the event of a fire.  The security strap prevents the extinguisher from shifting around or falling in the event of a capsize.

Seat Cushions:

You can probably guess I wanted it simple.  Think Ham N Egger.  I was also concerned about the cushions shifting or denying me access to seat hatches.  And, could the cushion be used on shore for sitting?

DSC00424 This a piece from an old closed cell foam pad I had lying around.  I rounded the corners for a cleaner edge.  DSC00425I can move it to whereever I need it, including shore or a picnic table.  I could also kneel on it when tying up at a dock.  I could also place it under my air pad at night to slightly raise my head a bit.  I could also roll it up and beat my sailing partner with it late at night to a full moon.  The list could go on & on.

DSC00423It stores easily inside any of my compartments.

Now on to Oar Stowage

3 Modes of Transportation in under 12′

While at Port Townsend I learned a lot about sailing.  One thing that really impressed me and caught me by surprise was how efficiently many Scamp owners rowed their boats.  I would be motoring along at say 3 knots (totally guessing here) and the Scamp rower would be silently cruising along beside me at nearly the exact same speed.  And, they were not all collegiate rowers with perfect technic.  Wow…I didn’t realize how well Scamp could be rowed.  I knew I wanted to have this capability.  How cool would it be to have three modes of transportation on my Scamp.  Sail, Row or Motor.  I love the expedition feel of this little boat and oars makes it so much more dependable.  Besides, rowing is shippy and natural and silent.  I wanted oars for Shackleton.  DSC00450UPS brought me this gorgeously wrapped item the other day.  Any guesses?  Purchased from eBay, these 9′ spruce oars sold for $79.00.  Total bargain.

DSC00426I’m impressed with these beauties.  The blade shape was a little crude, otherwise all looked well.

DSC00427I reshaped the bottom edge a bit, nothing major.

DSC00436Then sanded the lower 4″ or so.

DSC00449Added a coat of epoxy.

DSC00426Then tipped the ends with red, just for looks.

DSC00437Then I took these perfectly fine oars and cut them in half.

DSC00439Reshaped the ends a bit to bring them closer to round.  Shinto rasp, baby.

DSC00443And added the carbon fiber ferrules from Duck Works.  This will allow me to store the oars inside the cockpit, under the coaming.  The ferrules actually add about 3″, so the 9′ oars become about 9’3″ which is even better.

DSC00446 DSC00445You need to be careful and not goop thickened epoxy inside the sleeve areas.  Otherwise, this was a very simple thing to do.  The connection between the pieces is absolutely rock solid…I’m very impressed with the quality of these ferrules.

Now figuring out exactly how to store these babies.  

Library Anyone?

I know Scamp is too small for a library.  But all cool wooden boats have a library, so Shackleton will too.  DSC00465I found this canvas bag at a craft store.  No, I don’t frequent craft stores, but my hot wife does, so I went with her.  Well, I found this simple canvas bag in the half off section.  I cost me a whopping $2.50.  I cut the handles off and decided it would make a great library for Shackleton.

DSC00468I attached it with finishing washers and 3/4″ screws.  Properly labeled, it’s ready for service.

DSC00473What a fitting first addition to the library.  This should prove handy for quick reference charts and maps also.

I’m having fun guys!

5 Purpose Bailing Bucket

A small boat is harder to design and organize than a large boat.  A small house is harder to design and organize than a large house.  Everything has to be multi purpose, sized to fit and nothing can get out of whack or the whole thing suffers.

Shackleton is small and I want it organized.

I started with a 20 quart flat back bucket.  It looked the part…solidly built with a rugged bailing handle, but it was just too big.  I couldn’t access the floor storage or the BH3 storage without moving the bucket.  I looked at several big box retailers for the perfect size bucket.  Many were OK, but none were just right.  Then I looked around my house.  In my kids bedroom was this waste basket.  The more I stared at it, the more convinced I became.  It was just right.

DSC00451This is the location I chose for the bucket.  I attached a stainless steel eye against BH3.

DSC00453With a bungie running through the eye, it holds the bucket in place and out of the way.  The rectangular shape fits the ackward space most efficiently.

DSC00464Notice how it doesn’t interfere with my storage hatches.

Now for the 5 purposes:

DSC004551-Wet shoe storage.  This should help contain all the dirt and gravel that come in on shoes and keep the boat much cleaner.

DSC00461

2-Porta Potty.  Utilizing the same bungie, I can secure a Wag Bag inside the bucket.  The footwell provides a very nice place to conduct business.  I plan (haven’t actually tried this yet) to sit on a filler board, then ease off the back side and get R done.  Simeon takes credit for developing this technic…he described it to me in Port Townsend.  Wag Bags provide an effective and simple solution to the porta potty problem.  If you’ve never used them, you’ll be impressed.

3-Pee bucket.  Capture, dump over the side.  Remember for pee, dilution is the solution.

DSC00462

4-Bailing Bucket.  This size should work well to get into the corners of the footwell for fast and efficient bailing.

5-Garbage.  By placing a grocery bag inside the bucket, it would also work well for granola wrappers or micro trash.

Now building break down oars.

Remaking the Filler Boards

My original design for filler boards didn’t work out as well as I’d hoped.  I had purchased 3/4″ pine, planed it down to 5/8 and trimmed to fit.

DSC00423However, one of the boards split right down the center.  This did little to inspire confidence.    I considered making all the boards out of baltic birch plywood, but this would have been quite heavy.  I went back to Home Depot and looked around for an alternative.  And there she was, staring at me from the dusty, orange lumber rack:  Number 1, straight grain, clear poplar.  She was tall, straight, with nice color variegation and no knots.  Perfect 10.

DSC00426 The boards are soft, lightweight and beautiful.  DSC00424Like the earlier design, I cut one hole in the center of each board.  This works very well for one handed installation and removal.  I left the boards a full 3/4″ but rounded fore and aft edges.  I left the port and starboard edges square for a good fit into the seat edge groove.

DSC00418When storing, I place all the boards onto the aft sole hatch.DSC00417The hatch holds the boards up off floor.  This gap allows me to slip the 3′ river-straps around the boards with ease.

DSC00421I then grab the strap tails to slide the boards back into position.  The straps also cushions the boards slightly and holds them up off the floor.  This will minimize road vibration and wear, as the straps isolate the boards from the floor.  And, there is just enough room for a storage bin to sit on top of the boards, under the seat.  The height of the cam buckles keeps the storage bin from sliding forward.

DSC00420Yet, can easily be pulled up and over the buckles for easy access.

I love organizing my boat.  The efforts I’m making now, will make my sailing trips more comfortable and enjoyable.  Now on to the 4 purpose bailing bucket.  Can you guess the 4 different purposes?

Installing Oar Locks

With the oar lock blocks made and epoxied in place, I applied two coats of high gloss spar varnish and secure them with #10 stainless 1,1/4″ screws.  DSC00422  DSC00420  You need to drill the holes out to just the right size for a good solid fit.  I tested the hole size first on a scrap piece of oak.  Once I selected the proper hole size, I drilled the holes and tightened in the screws.  DSC00418I designed the blocks to fit just below the top the the coaming.  I wanted the installed oar locks to fit just below the coaming top for a smooth top line.

I’m now ready to build my break-down oars using the fiberglass connector kit offered by Duck Works.

Anchor Mods & Finish Up

Today, I was able to finish up the anchor system and stern bench seat.  The stern seat will make it easier to deploy the anchor and work the outboard.  It also provides a nice place to lounge while cruising with the outboard.  I through-bolted the seat to cleats placed underneath for a secure attachment.  DSC00423The bungie cord ties below with a figure 8 knot.  This provides a simple yet effective way to secure my anchor.  It also allows for very quick deployment of the anchor.

DSC00430The Fortress Commando anchor chain was a bit small and a bit short.  My theory is that you need a good heavy chain, especially with a lightweight anchor.  I replaced the 6 feet of 3/16″ chain with 12 feet of 1/4″ chain.

DSC00427The 1/4″ chain fit nicely with the existing shackle that came in the kit.  I used Pro Lok on the threads before tightening.

DSC00417This shot is from beneath the stern seat.  You can see the anchor arm extending toward the sole.  It fits nicely just inside the scupper.  Also, notice the anchor line coming through the seat longitudinal, then running back inside the anchor line storage area.   I secured it with a figure 8 knot just inside the anchor line storage area.

DSC00433Anchor, chain and line all secured in its proper place.

I’m anxious to get out and try this setup.  I have absolutely no experience anchoring a boat, so this should be educational.  

Building Oarlock Support Blocks

I wanted more support than could be achieved by simply screwing the oarlock directly into the cockpit coaming.  I looked around the shop and found some left over oak (from the skegs) that would work nicely as support blocks.DSC00417

DSC00421I cut a dado to maximize the glueing surface area.  This should provide a very solid base.  All angles were running bevels, as nothing is straight at this location on the boat.  I took my time and got the blocks to fit the best I could.  The vertical face is sloping off at 10 degrees for the proper oarlock angle.

DSC00424Each side was a little different, so I labeled them Starboard and Port and made each block to fit properly.  DSC00427Sanding the finished boat to accept the un-thickened epoxy.

DSC00431I held the top just below the finish coaming.  This allows me to mount my oarlock and have it sit just below the top of the finish coaming.DSC00432I then applied thickened epoxy to all mating surfaces.  One clamp seemed to hold it properly.

Summary:

I can’t wait to mount up the oarlocks on these support blocks.  I feel good about how these turned out.  

Stowing the Anchor

Anchors are sharp, clunky, awkward and muddy.  Yet they are a necessity.  Where to store one has been a vexing issue.  Here’s what I came up with.

DSC00451First off, I chose a Fortress Commando lightweight aluminum anchor.  If it doesn’t hold, I’ll go for a heavier one, but if it does hold, I’ll have saved some significant weight.

DSC00452I knocked off two of the exposed rough edges.  After all, I want this to live inside my boat.  I also want to prevent lines from snagging on the anchor.

DSC00455Showing the top ears cut off at a 45 degree angle.

DSC00456I then rounded the ears with a metal file.

DSC00466I made a stern seat board (which I will secure in place) for increased comfort when motoring or working with the anchor.  Near the back corner, I cut a slot to hold the anchor in a vertical, ready to deploy position.

DSC00463 The black piece (yet to be bolted down) is UHMW.  It will protect the plywood edges of the wet storage.  My anchor line will run into the access hole.  The bitter end will be secured inside this wet storage compartment.

DSC00470Showing the V notch cut into the baltic birch.

DSC00467I then ran a black bungie cord around the back of the anchor.  This will keep it in place during a capsize and prevent the anchor from vibrating as I travel down the road.  I think I’ll round off the back ears as well for easier bungie removal.

DSC00475My anchor line runs through a captive bow eye and then back to the cockpit for easy deployment.  I chose to store and deploy off the Port side.  It just felt more natural to me for some strange reason.

DSC00473The brass ring-line allows me to retrieve the bow anchor line while seated from the cockpit.  Remember, you can’t reach the bow.  By drawing in the brass ring-line, the anchor line is brought back to the cockpit for easy retrieval.  Hard to explain, so I won’t try.  I got the idea from Howard Rice off the Scamp forum.  I mocked it up in my garage and I believe it is going to work well.

I’m amazed at all the systems that need to be considered, worked through and solved, in order to have an organized boat.  I keep thinking I should be about done, but there is actually quite a lot to go.  Luckily, I’m still enjoying the process.